Step 1 – Check the parts included with the kit 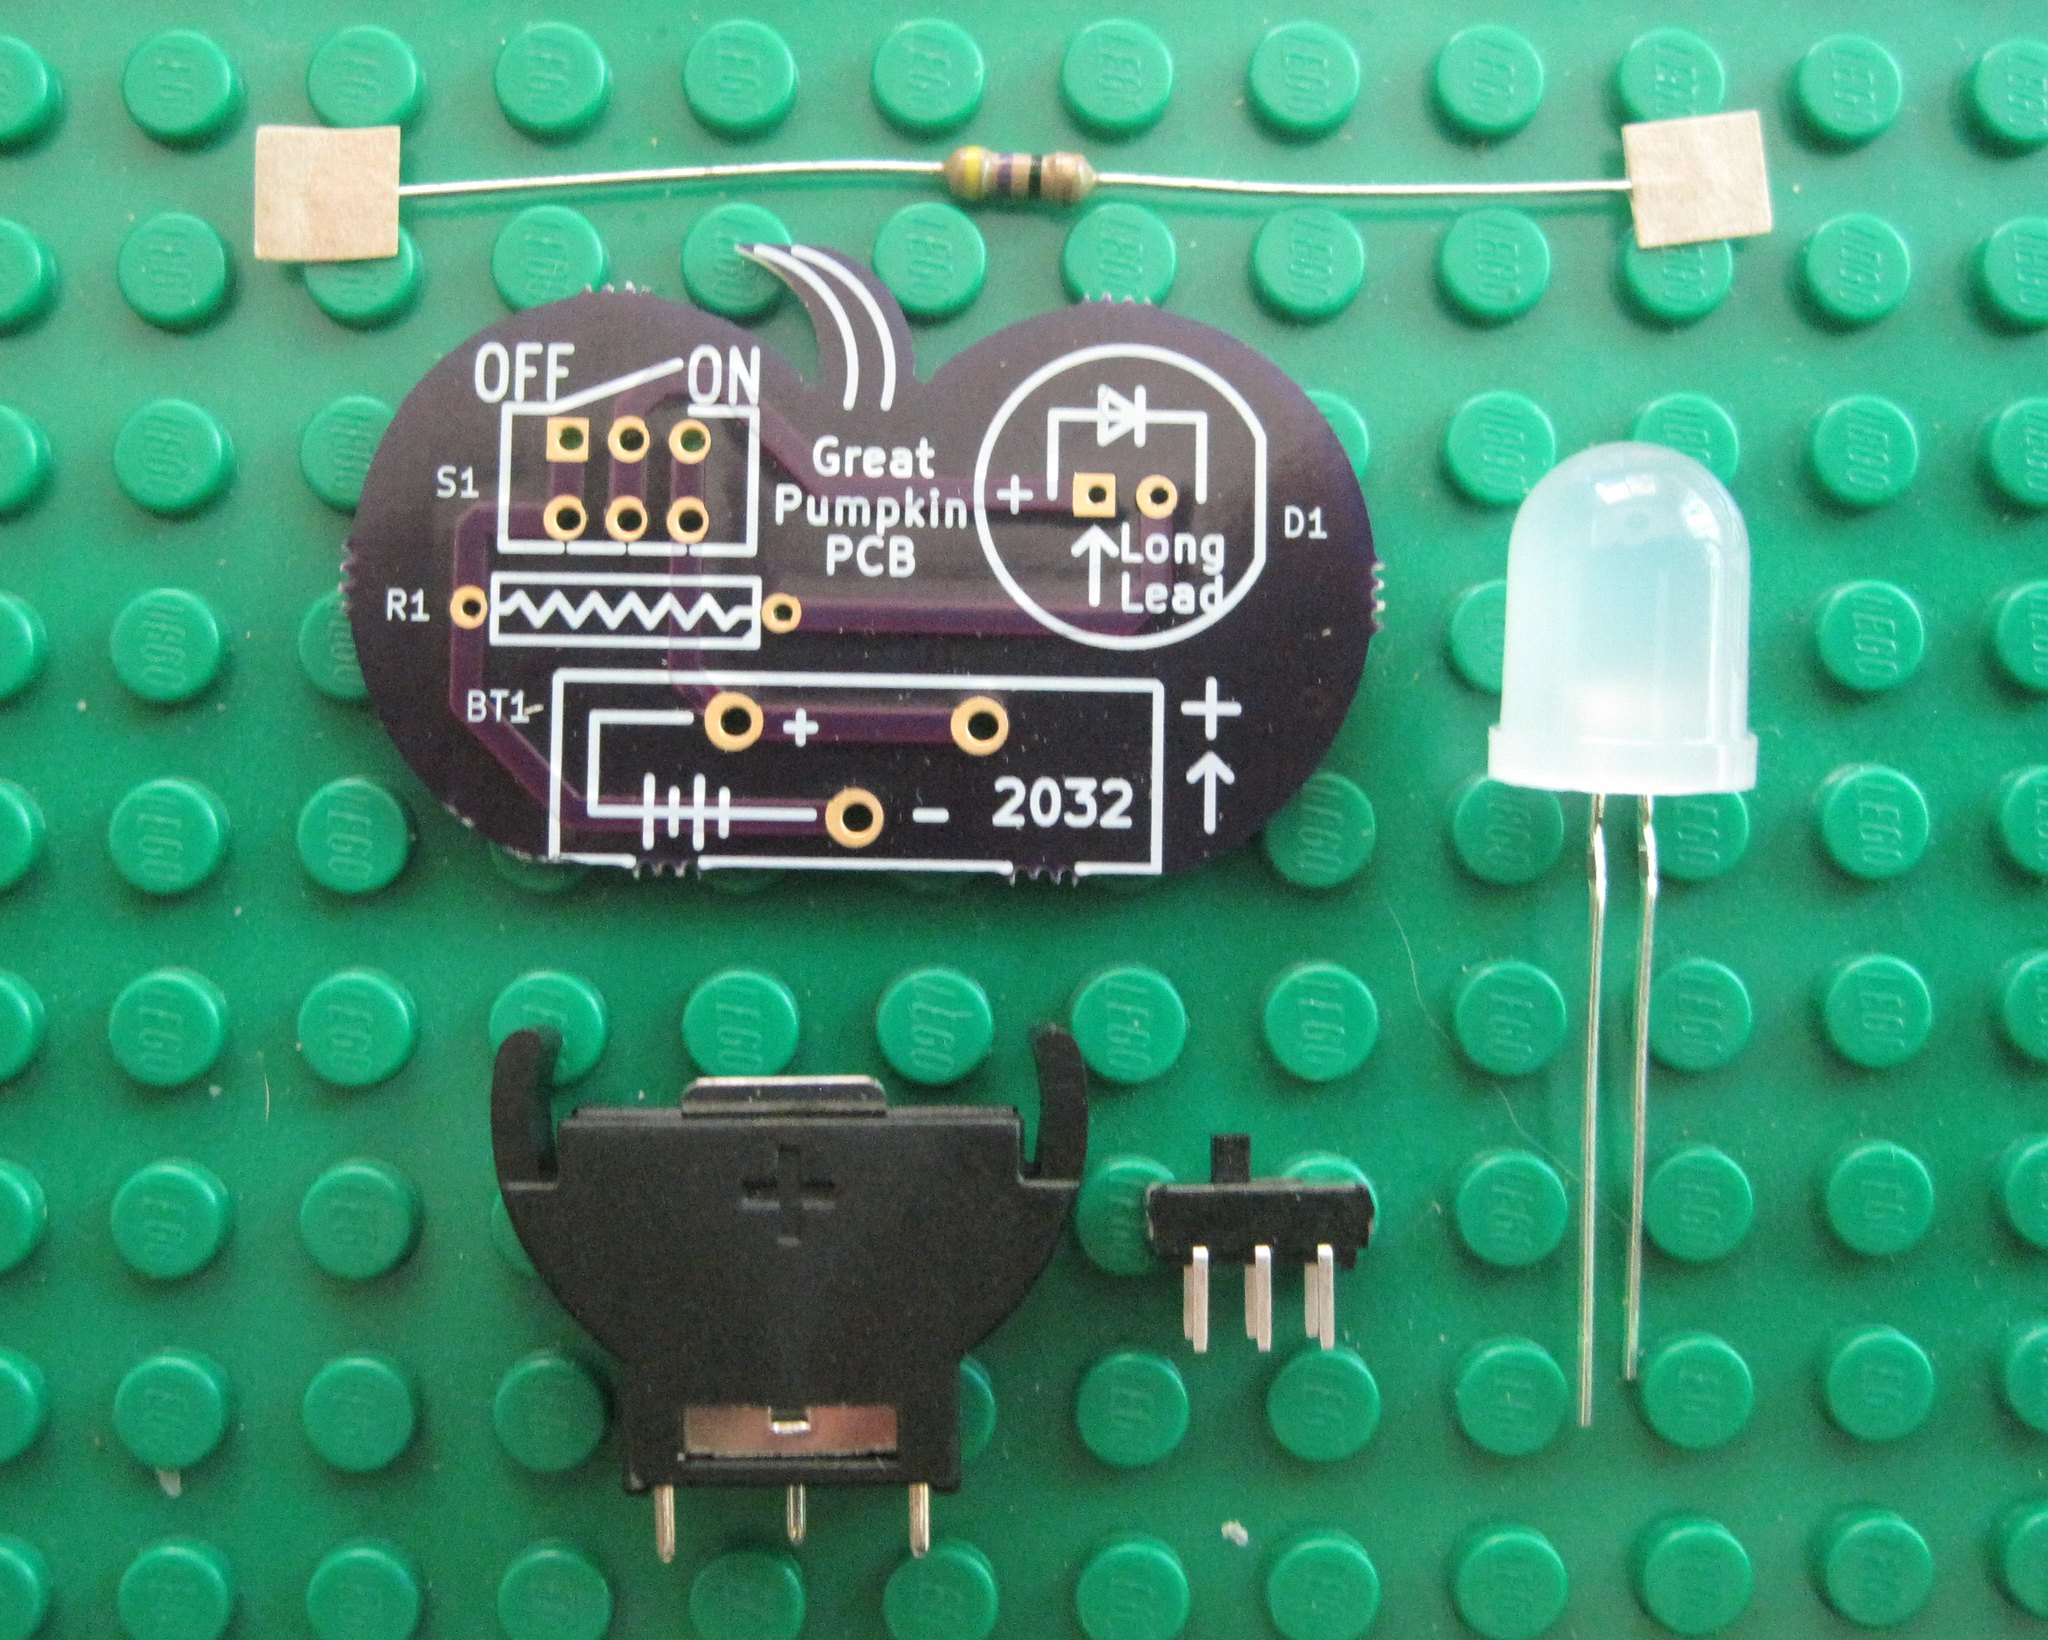
Step 2 – Find the resistor 
Step 3 – install the resistor into location R1 
Step 4 – find the switch 
Step 5 – Install the switch into location S1 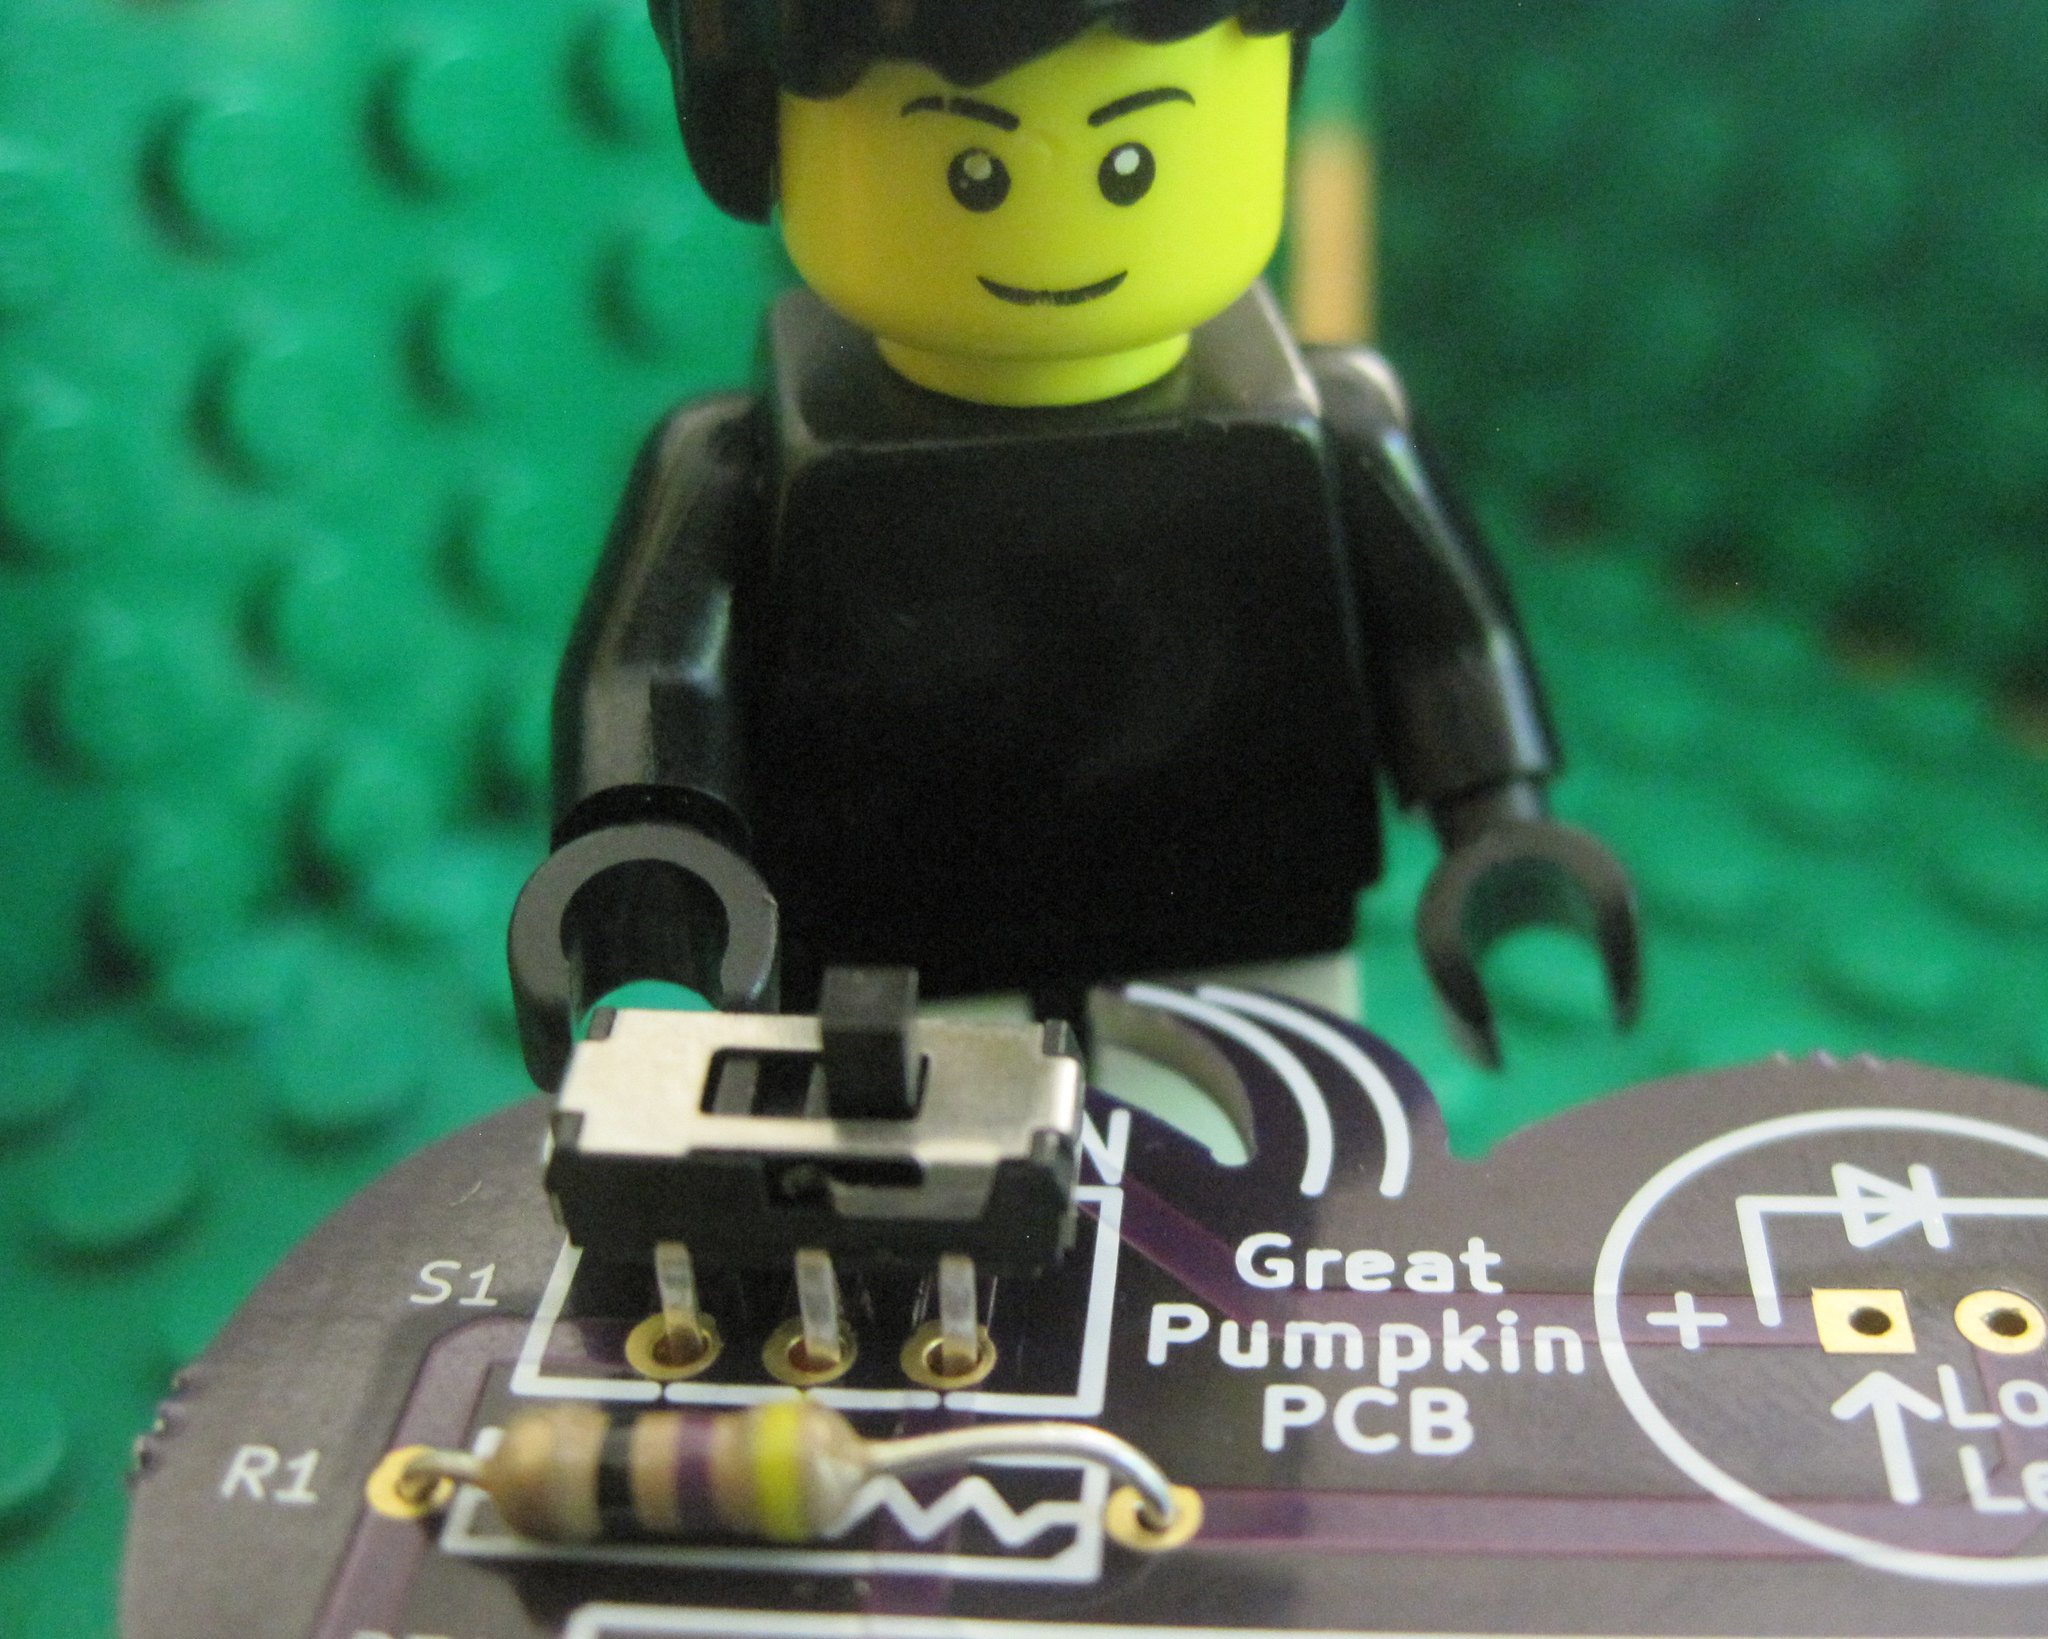
Step 6 – Find the battery holder 
Step 7 – Install the battery holder into location BT1 
Step 8 – Find the 10mm LED 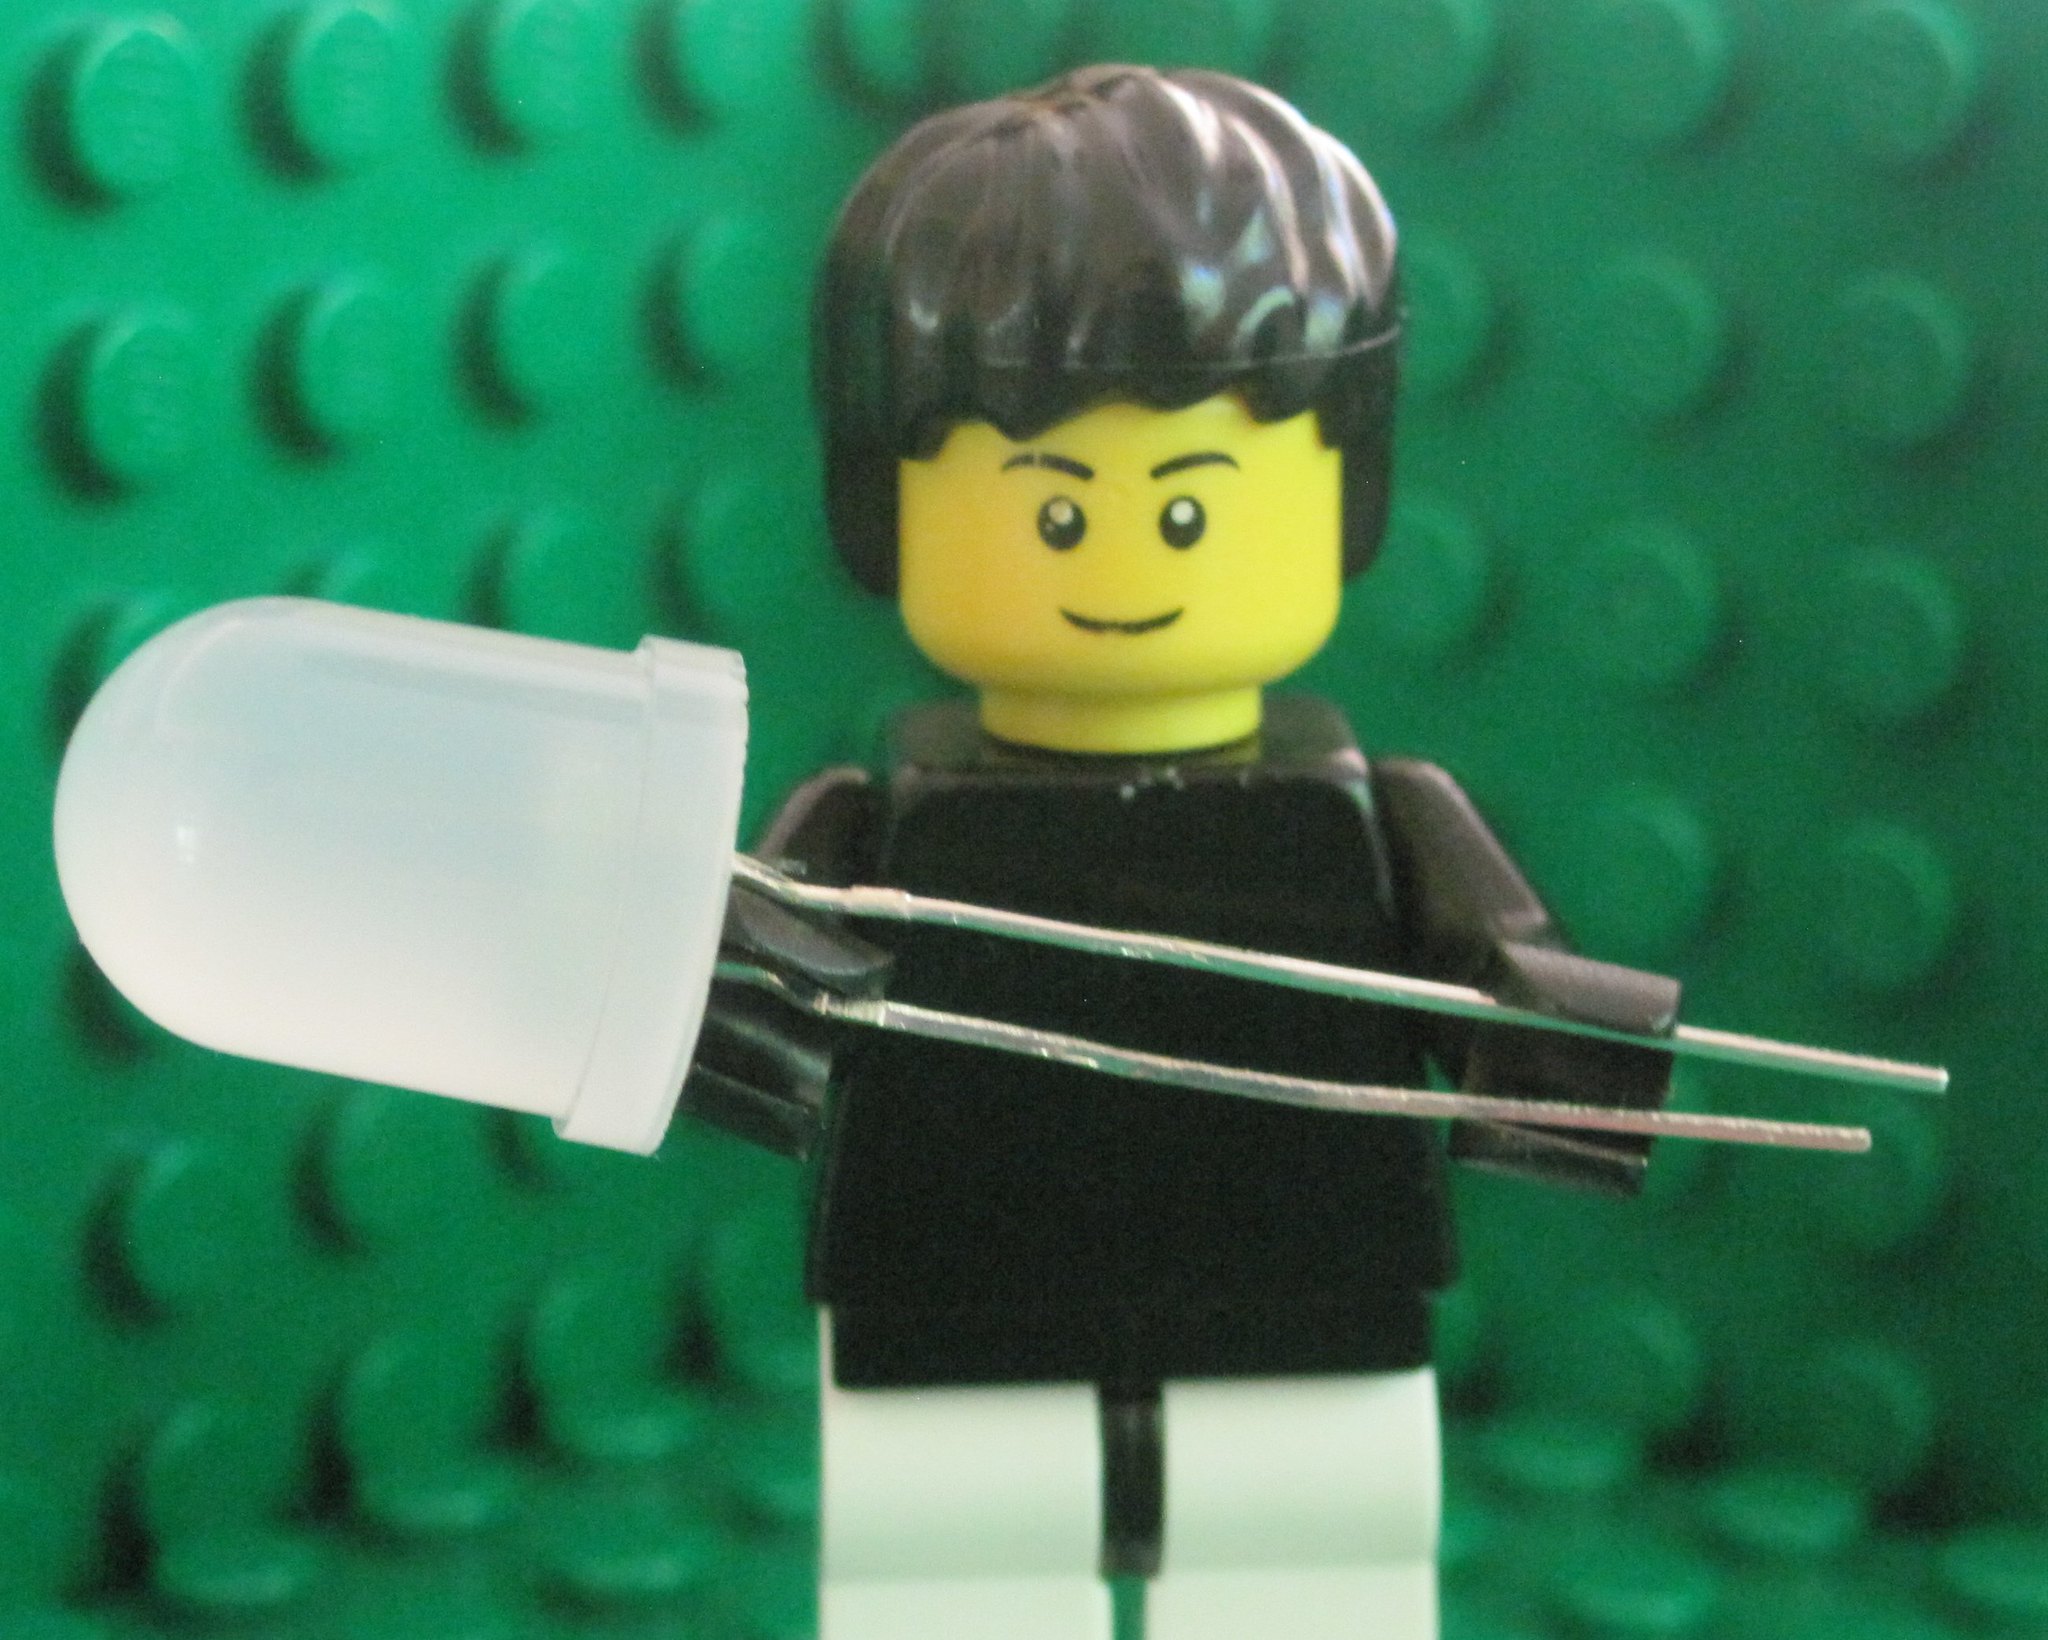
Step 9 – Install LED into location D1 with the longer lead of the LED into the square (+) pad 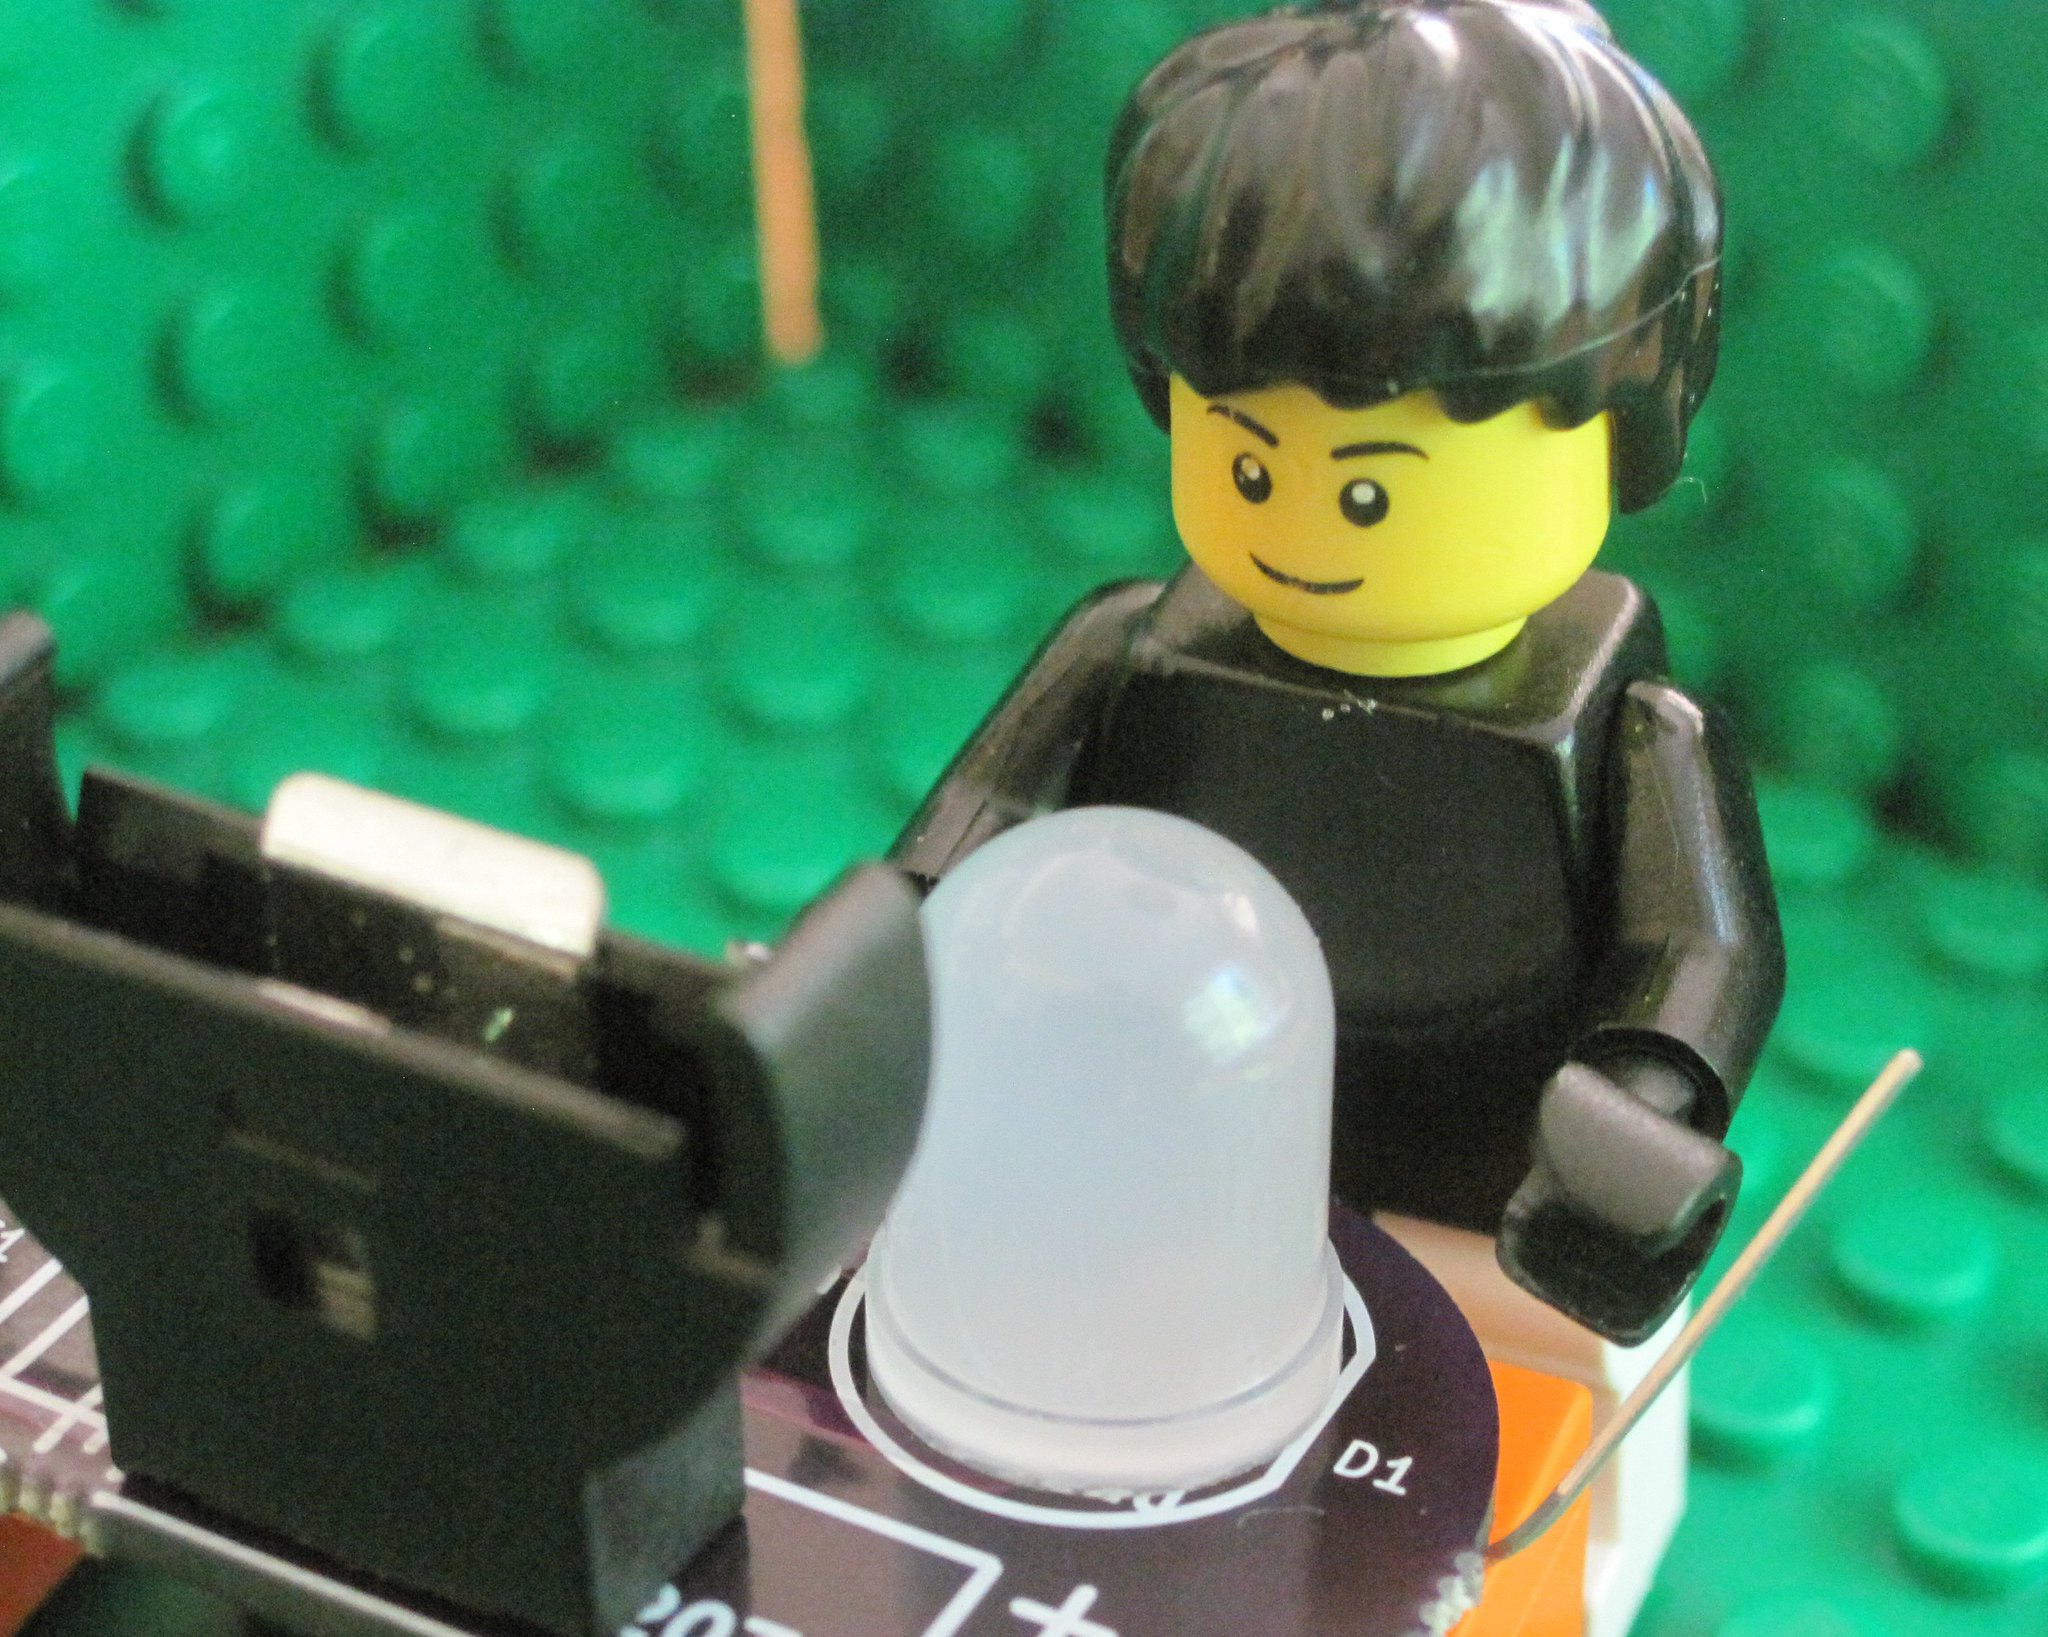
Step 10 – Turn over the printed circuit. Bend the leads of the parts to hold them in place. 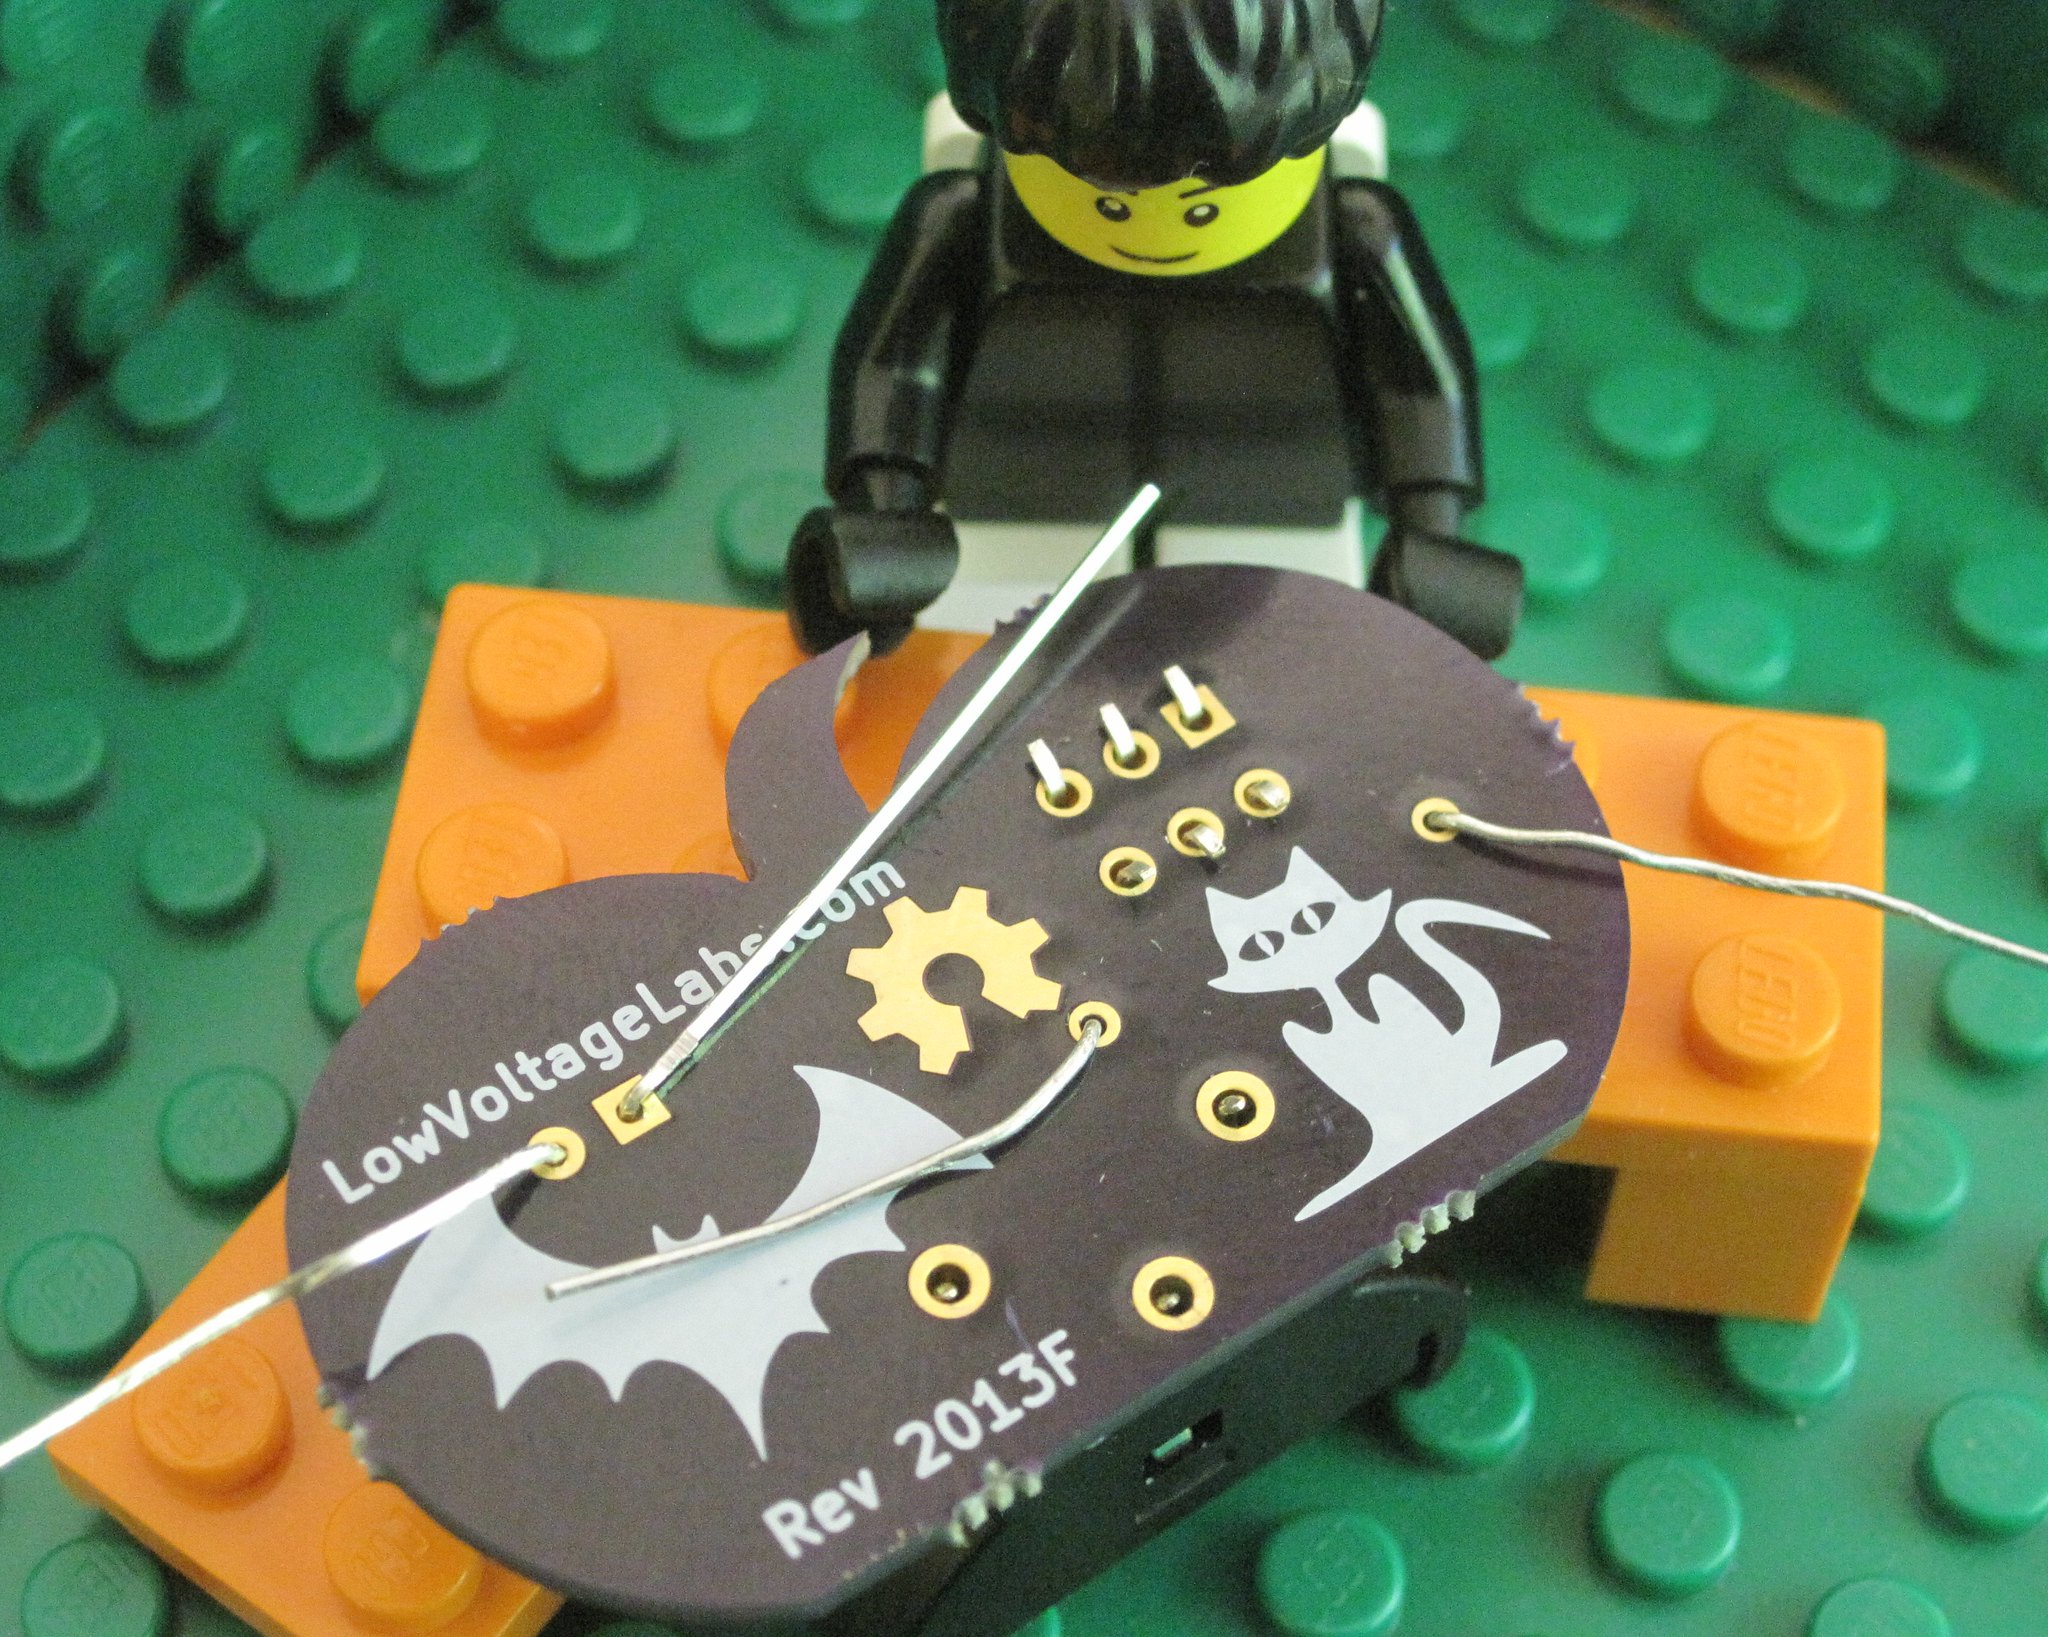
Step 11 – Solder the parts to the board 
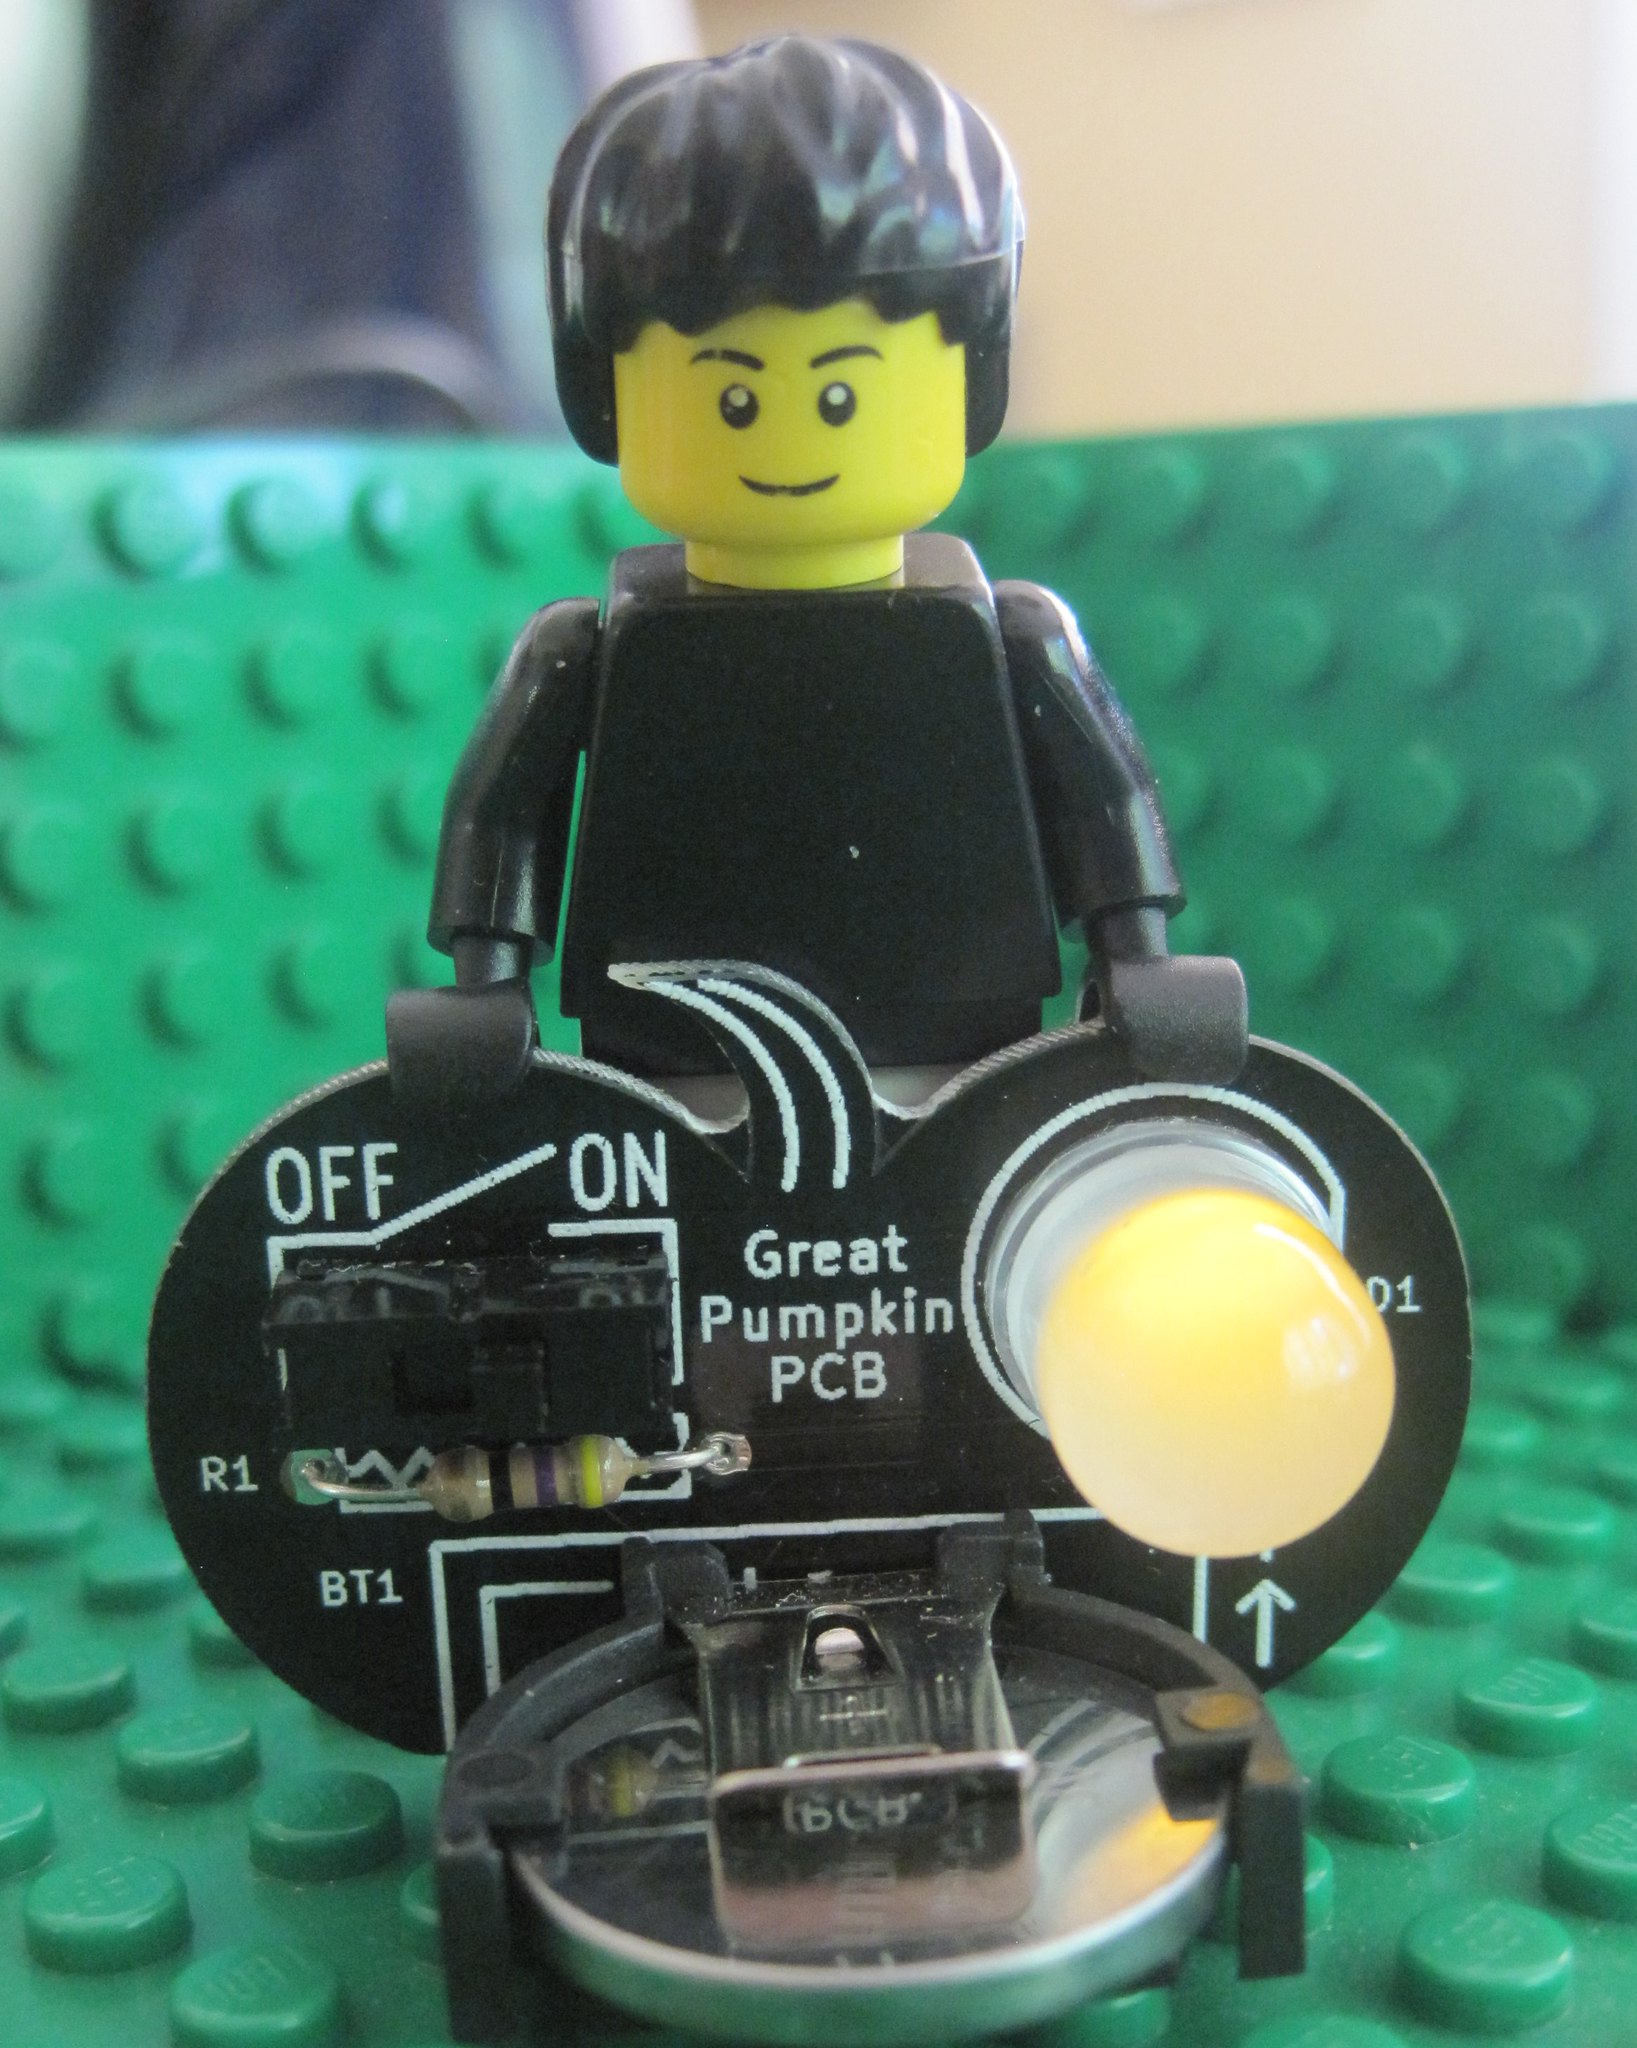
Step 12 – Install a 2032 battery with the + side up. Turn on the switch and watch the LED flicker!